Getting Started
Contact the back-end team if you want to set up your project and try out some of MKNet's amazing features.
You can integrate MKNet into your game at any stage of development.
Once we deploy staging environment for your game, you can download and integrate MKNet SDK into your Unity project, and start testing the APIs and Administration panel.
Download and install MKNet SDK #
To begin using MKNet in your game, the SDK will need to be installed and initialised.
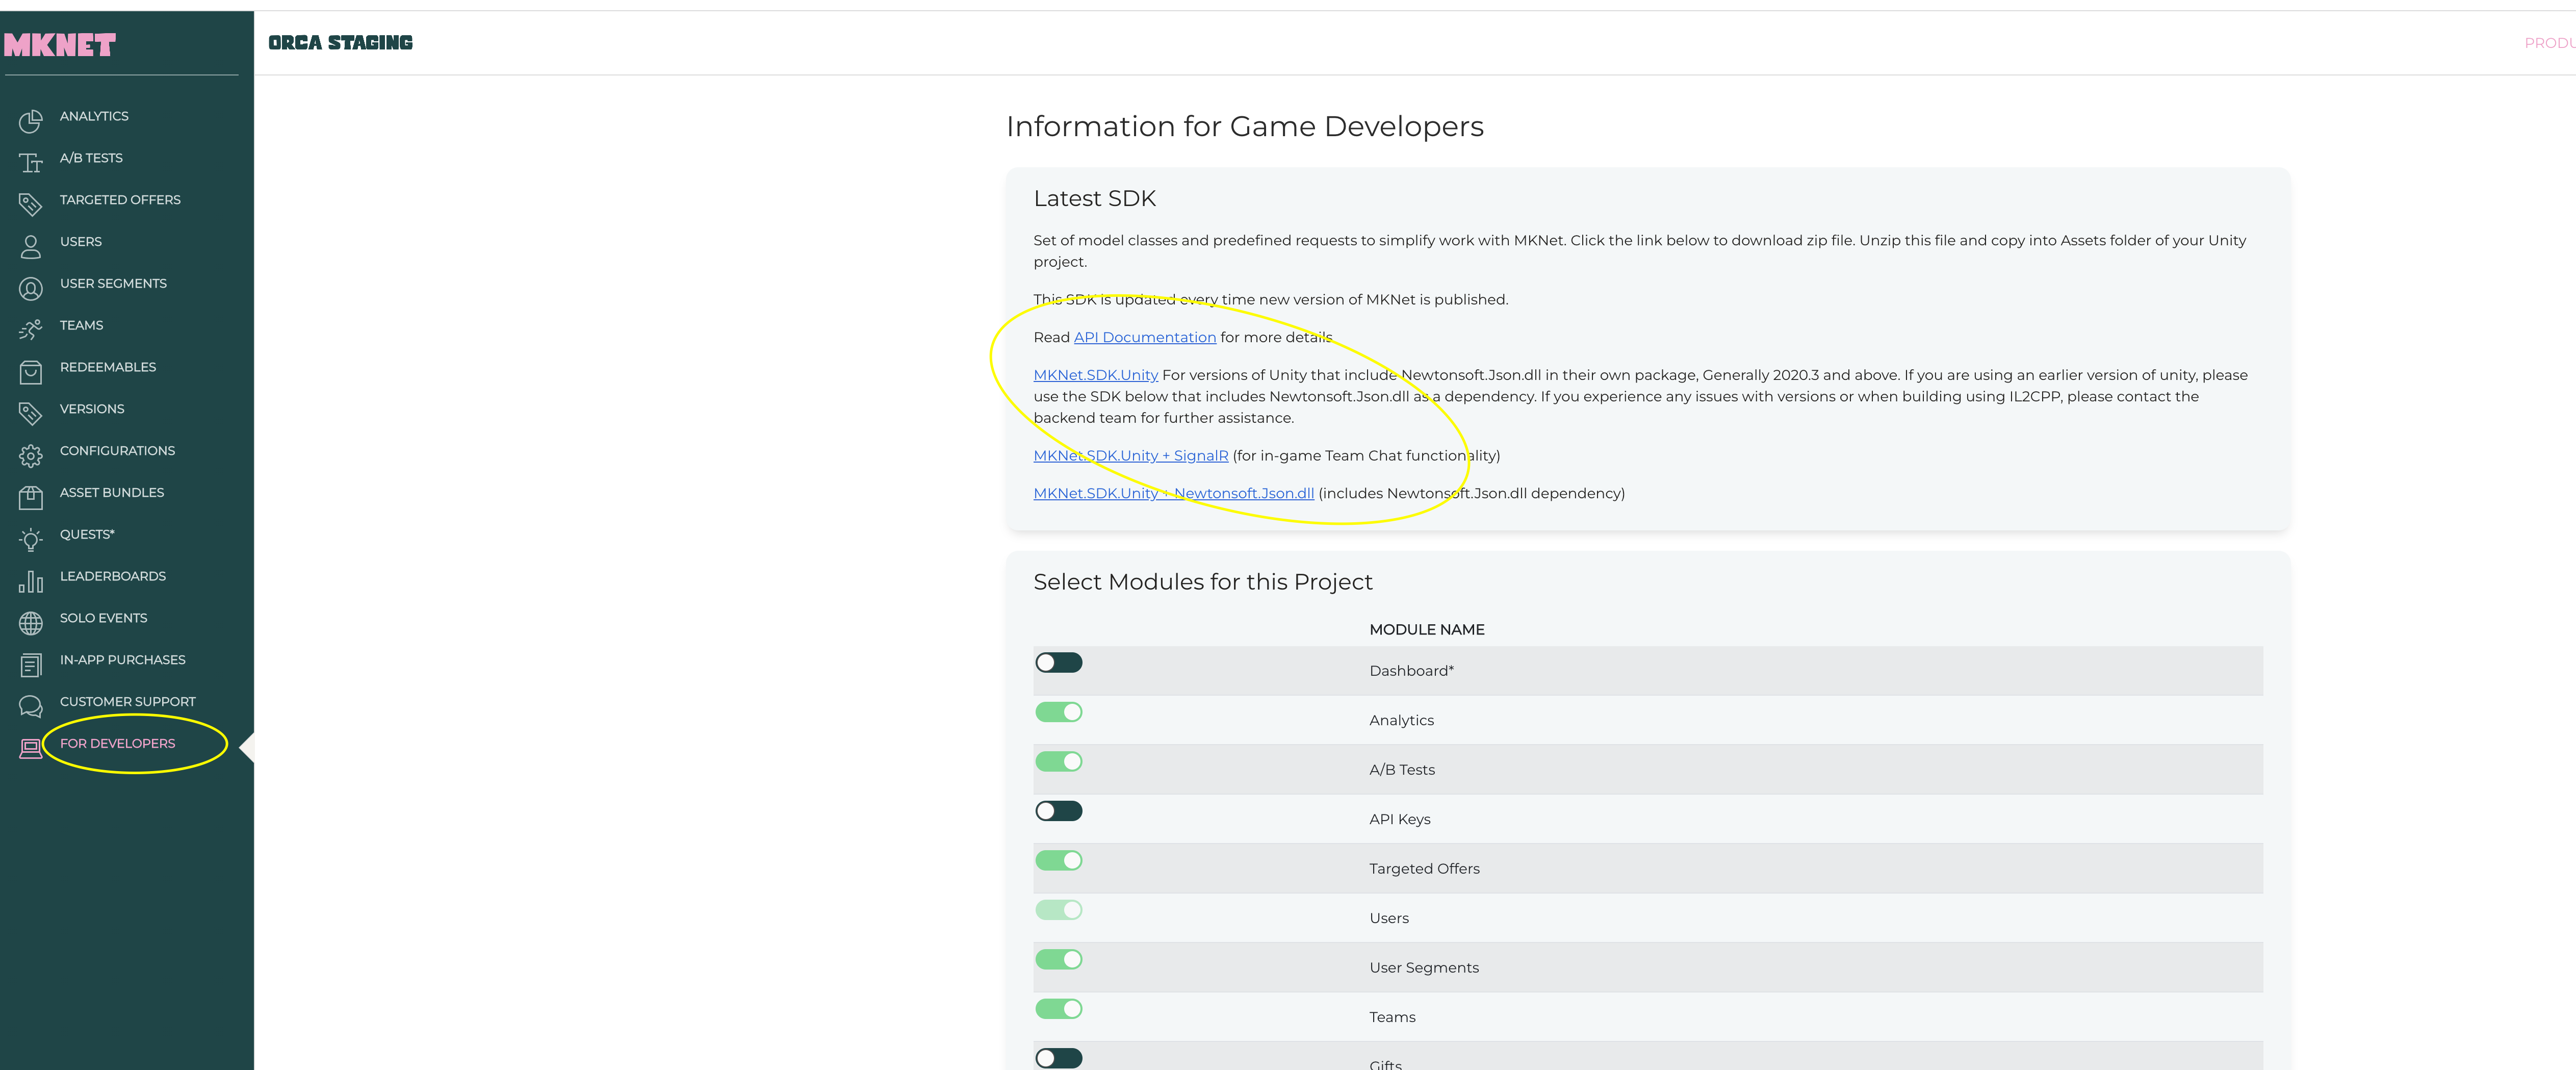
Open your project's admin portal and navigate to section "For Developers". Depending on the version of Unity you are using, you'll need to select the relevent version of the SDK from the list of download links.

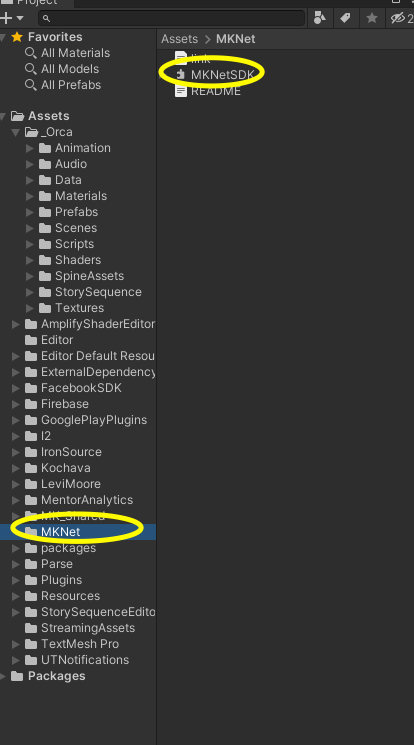
Extract the files in the .zip file and copy into your project.

Setup MKNetSettings #
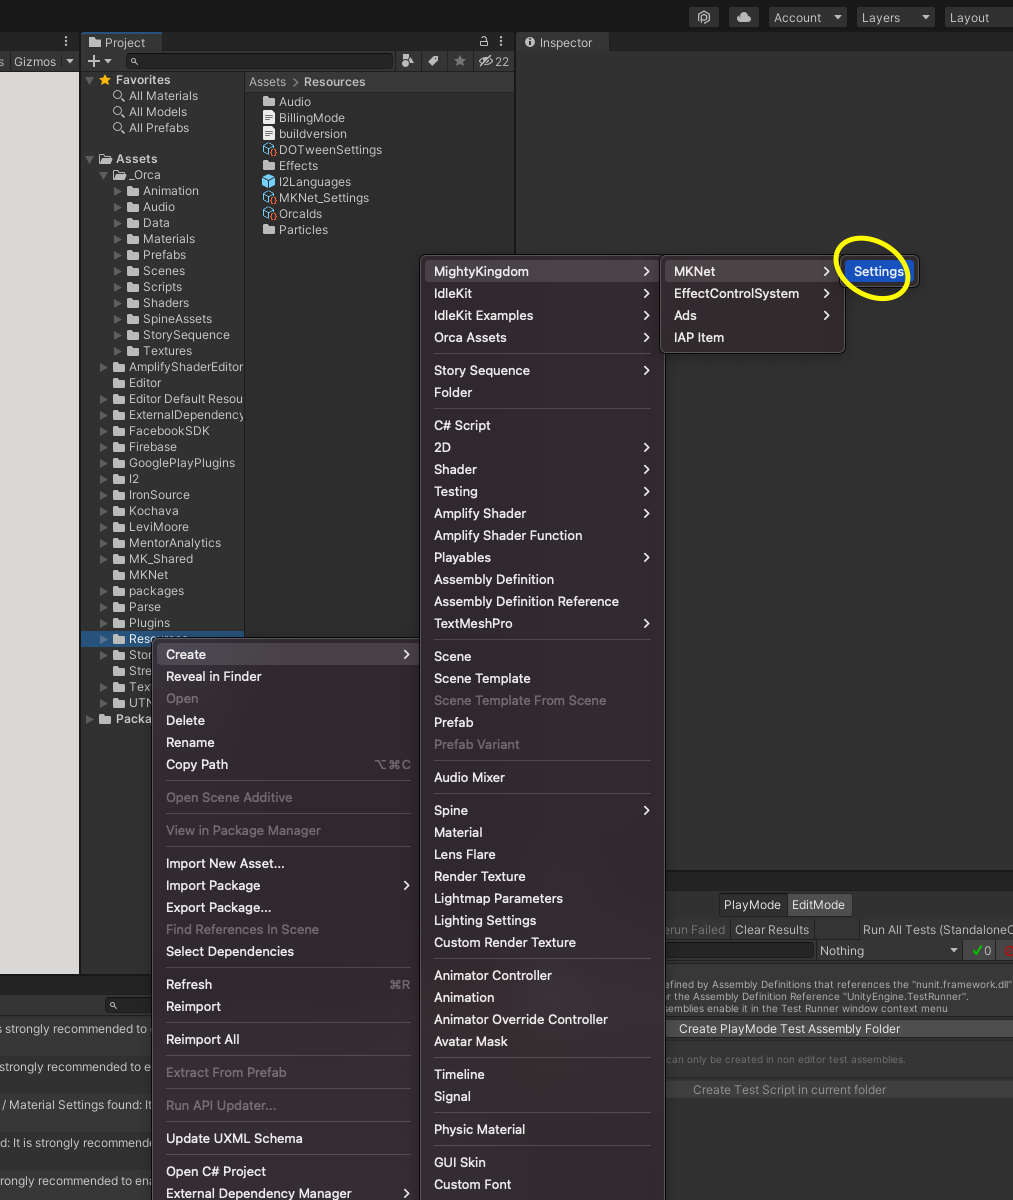
In your Unity project, navigate to Create->MightyKingdom->MKNet->Setting. This command will create an asset in your /Assets/Resources folder that will hold MKNet configuration details.

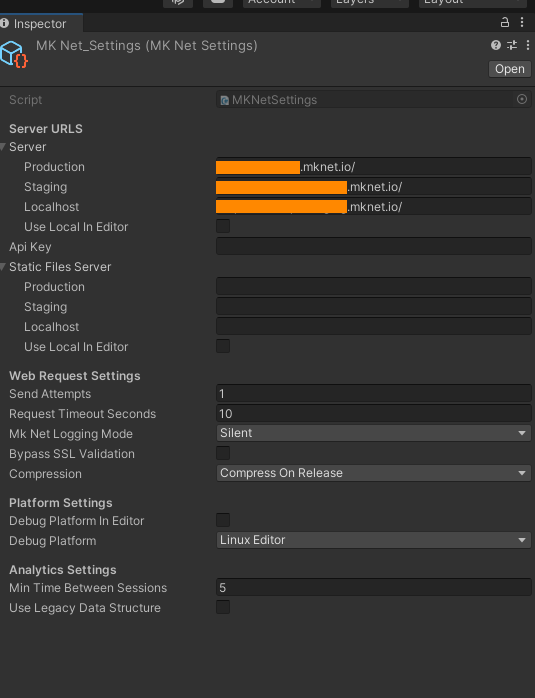
Modify your settings panel with the relevant values.

Initialise MKNet SDK #
This is an important step that will ensure SDK attempts connection to the APIs.
Initialisation needs to happen as one of the very first actions when the game starts. This will ensure that SDK has initialised MKNet User. Without MKNet User any calls to the APIs with fail with 401 Not Authorised error.
Here is a sample initialisation code (please ensure you call MKNetAnalytics.Init()):